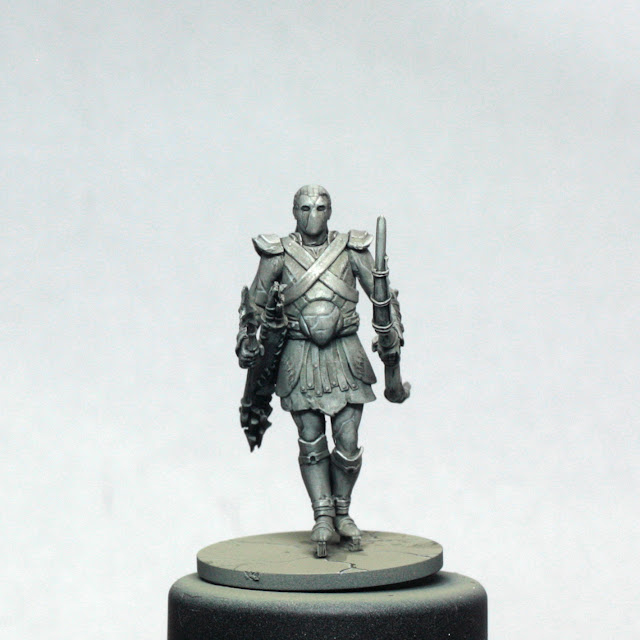
I was asked several months back to undertake a commission for Kingdom Death, to paint the entire contents of their boxed game, Monster.
Monster contains over 40 miniatures, including some pretty big beasts, and I had a pretty tight deadline, as they needed them done in time for Gencon.
Fortunately, however, I didn't need to paint them as individuals; quite the opposite in fact, as they were needed to resemble slightly crumbling statues, reminiscent of some of the artwork found on the "Innovation" cards in the game (and in a few places in the rulebook).
I was provided with a guide by one of Team KD's sculptors, Thomas David, and I was off! :)
I managed to get the full set done within the time required, and they debuted at Gencon 2016.
Now, this might ordinarily be the end of the story, but Kingdom Death have run a Kickstarter to unfeasibly huge success, and the miniatures that I painted feature heavily in the campaign video and on the front page of the campaign too.
To this end, a great many of the backers have asked about how the stone look was done - and indeed many theorised that the miniature moulds had been deliberately "scarred" to create the cracked stone look, which I can reveal to no great surprise that they are just a really old painting trick known as "Trompe-l'œil".
So, without further ado, here is how the look was acheived. This process is ideal for block painting of at least 4-8 survivors or 2-3 monsters at once, so that you don't have to wait for paint to dry. I managed to paint this one model in less than an hour, so no great investment to get your minis looking good ready for a game!
1) Prime in black.
I used an airbrush, but a black spray primer would be fine.
2) Basecoat in a grey-brown
I used an airbrush to cut down the time aspect, but brushing on would be equally fine.
The paints used at this stage were GW Zandri Dust and P3 Ironhull grey at 50/50 ratio. Any stony grey could work, so long as it has a bit of brown or khaki to stop it looking too monochrome.
3) Highlight by adding ivory/cream to the mix
Again I'm still using an airbrush, spraying on from diagonally above.
I added about 50% P3 Menoth white base to the mix in 3 stages - each stage adding equal Menoth to the amount of paint in the airbrush. In reality it's a couple of drops of paint each time.
Each stage I increased the angle until I was spraying directly down on the mini's head.
4) Drybrush with a light tone
It is fairly important to use a quite soft drybrush, and do this sparingly. I used GW Pallid Wych Flesh, which has a really pale, very slightly pink stone colour, but again, anything along these lines will work fine.
5) Wash
I used GW Agrax Earthshade with a little GW drakenhof nightshade - a dirty brown and dark navy wash - and diluted it about 50/50 with water. I then applied this liberally to the model.
Once I had covered the mini, I then blotted my brush and used it to pick up the puddles of wash on the mini. This avoids staining rings where I don't want them, but allows me to leave a little more here and there, and indeed encourage a little bit of streaking where I imagine dirt running down the model that is now beginning to resemble a statue.
6) Cracks
Taking some black paint and mixing it with my wash I quickly, but CAREFULLY, painted on some cracks using the tip for a good brush with a fine point. I allowed a little natural shake to my hands to create lines that weren't straight, and it's easy to find real world references of cracked stone to create the pattern if you're not sure.
The final touch is to highlight the BOTTOM edge of the cracks with a near white colour. I added white paint to my final highlight mix - but equally a little white mixed with the drybrush colour will work too.
The important thing is to be careful to follow the previous line, don't make the white thicker than the black, and if your black lines are a little thick, paint slightly onto them, to make them smaller.
Aside from using this white to just lightly edge highlight a couple of spots, that is it. Done.
The cracks are the only part that require any expertise with a brush, and really aren't necessary, they're just an effect to tie into the art.
I hope that you find this helpful, and who knows what the rest of this campaign may unveil.
Happy painting! :)
Scott


This is incredible! Thanks for the tutorial
ReplyDeleteSo good
ReplyDeleteThanks for the tutorial man!
ReplyDeleteSuch a nice wonderful Blog!
ReplyDeleteIf you guys are searching for Residential Painting Company just visit to my website.
We provide Professional Painting Services in Coatesville, PA, United States.
This was such an interesting read! A glass painting adds a beautiful mix of colour and light to any room. The way the artwork reflects and glows makes it stand out in such a unique way. This post definitely inspired me to look for a glass painting that can bring a bright, artistic touch to my home décor!
ReplyDelete