Tuesday, 25 February 2014

Ladies, please. One at a time...

Having forged ahead with the walker model, I have been feeling unsure about how much or little to weather the panelling, and particularly whether I really should have done some pre-preparation for the weathering to be "under" the paintwork... This is the perils of not planning the piece ahead enough, but I'll put that down to the fact that this is really the first model of this size that I've attempted in over 15 years.
It shouldn't really be a major issue, as I can do some sponging and fine scratching with sponge, brush and possibly pencil; and then I can add pigments, greasy glazes and such as final effects.

With this crisis of confidence I was in danger of letting the piece as a whole stall. So, to keep fresh on it I decided to have a play with the base, throwing down some fairly heavy weathering to give the impression of a very well used area where running repairs are always going on... Nothing too difficult, just washes, pigments and a bit of ink here and there. Since these photos I have actually distressed the tiles further, but
I don't have a decent shot of this yet.


Having worked on the base, I was no closer to picking the walker itself back up, so I painted up the pilot.
Colour scheme is essentially the same as the walker, and a few tweaks are still needed to refine the paint and add a bit of interest here and there, but most of the paint is on in most of the right places! ;)


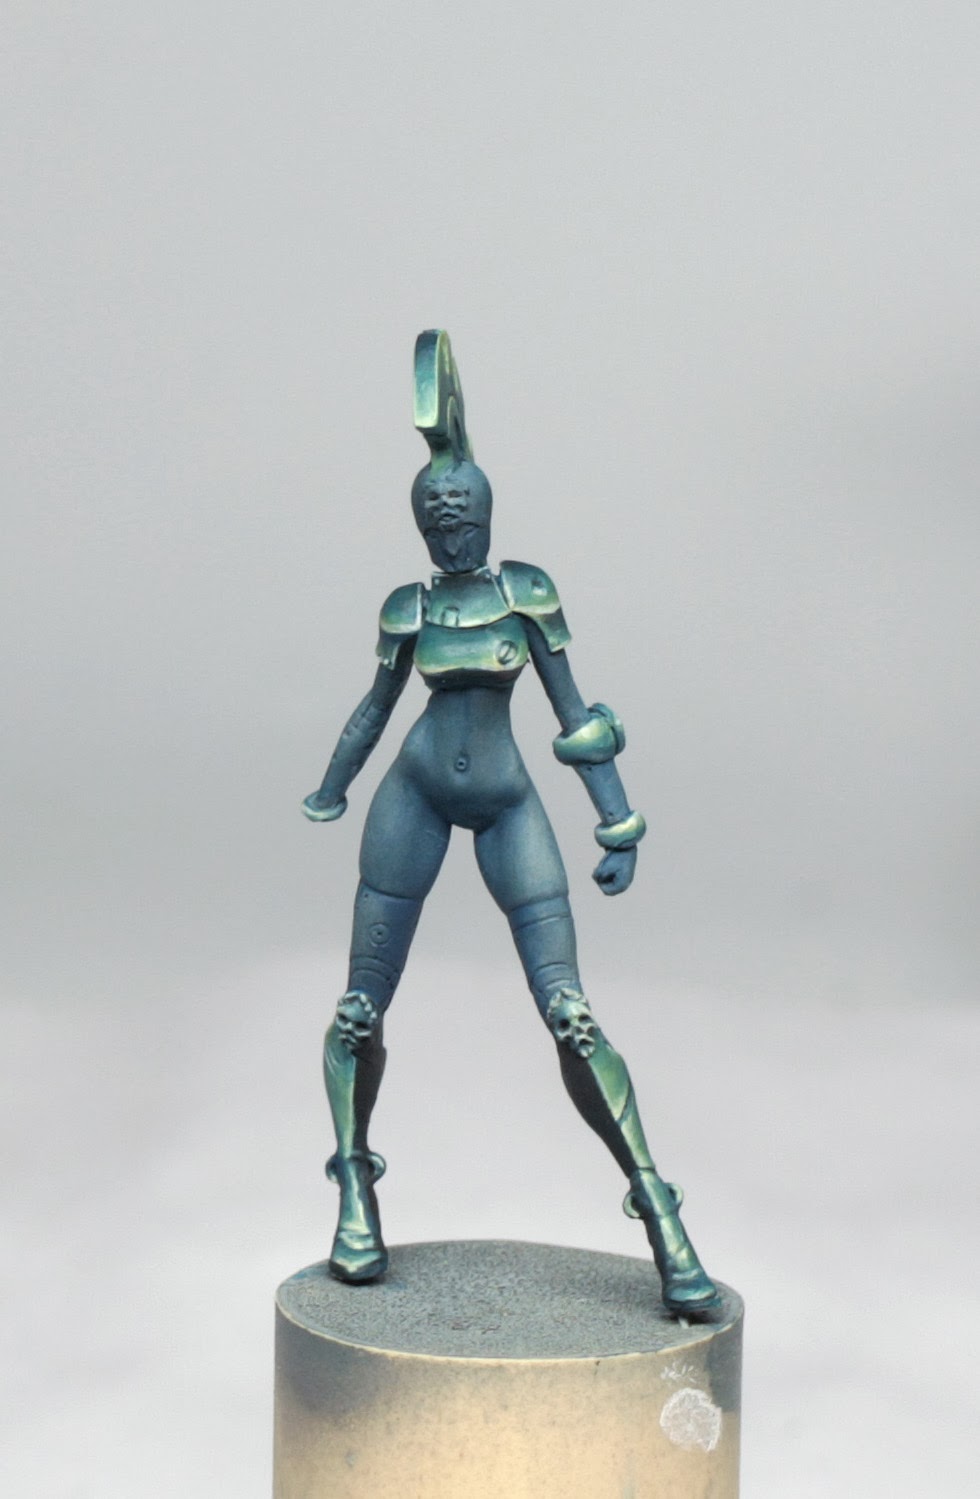
This weekend just gone I was fortunate enough to spend some time at the table (and the pub! yay! ^_^ ) with my good friend, Chris Octive. There was much chatting and chuckling, but while he worked on painting his latest Carrasco piece, I decided that I would make a proper start on a model that has been up on cork for a while now. This is Cassandra, from Thomas David's Agora line. I've had her for a couple of years now, and I have always had in my head that I want to paint her in a very clean, Tron-like finish. The fluorescent glow will come later, but the shiny dark/light contrast effect that I am aiming for is happening quite nicely so far (an afternoon's painting essentially)...


 Plenty still to do, but a nice change of pace to the more varied pieces in terms of texture. I plan on doing more bluey metal colours on the thighs and arms, and then some pale skin tones. The helmet is still under debate, as Chris suggested something quite left field that I may try out.... ^_^


Friday, 14 February 2014

Not sure where this is going...!

OK. I'll readily admit that I really don't know where this paint scheme is going! Having coloured in the basic "blue" of the bodywork, I wanted to add a contrasting coloured patterning, but didn't want to be too regular with it. So I started adding in an asymmetric linear design to the front plate, thought "That's not bad", and applied it to the rest of the walker! Inspiration or a bit nutty? Dunno. But it looks quite nice :)


Now I have the majority of the model "painted" and it is assembled, I shall no have to start deconstructing it all. I'm reluctant to smash it up too much, but I do want it looking well used, so I'm going to have a go at some weathering techniques with inks, oils and pigments. I also think that the blue now looks too flat, so I'm going to up the highlighting somewhat on the top areas.

The metals need to have a bit of tidying up and defining too, but I might leave that until later, as I've got to do some varnishing and airbrushing to the model, and masking off the metals is a bore...

Friday, 7 February 2014

Are friends electric?

This post is somewhat later than I had intended, but tis the season to be poorly. I've been full to the ears with snot, as has the wife and more importantly so has the little one, who has just been quite upset with it all. I am hoping that by getting an update in place that perhaps it will act as some sort of catalyst to feeling better soon!

So, Salute in London is on the way mid April, and I want to try and get a couple of new models painted in time for the show. I'm not going to put myself under too much pressure to work super hard and cram a load of entries in, largely because I can't hack the late night sessions these days. But, with the bonus of the airbrush now, I am sure that I can get at least one decent new entry done. Likelihood is that I will recycle a model or two for other entries too though... We'll see. ;)

Anyway. A while back I received a Soda Pop kit called "One Shot & Fritz", which is a kind of mecha-type walker and pilot girl (plus chibi mascot, but that's going nowhere near this piece!). From as soon as I saw it, I felt that the pose of the pilot looked more like she was repairing it or preparing it to go out, and was not necessarily the pilot herself too. So, I thought that putting the piece in a service area setting would be ideal. I also thought that her pose was such that she wasn't actually doing anything at the time, and more that she was in communication with someone else - maybe the pilot...
With that idea germinating in my head, I had a look through the grey pile and found what I think is the ideal model to complete the scene, which is Cyril Abiati's classic "Female Mech Pilot" which I picked up in a CMON store order a couple of years back. Her pose - with a tiny tweak of her neck position - is spot on, and her outfit and size are perfect for the scene. Better still, I found a resin base that a friend had sent me a while back when he was selling them (sadly no longer doing so). It fitted the scene perfectly and the mecha stands on it in just the right spot too. It's not often that these things come together so well, but sometimes it does pay to have hoarded this mini or that part with a view to a future diorama/vignette...!
Once I had cut down a conveniently sized instant coffee jar lid (more hoarding!! lol) to serve as the plinth for the base, I set about cleaning, sanding, pinning and rough assembly of the piece


I do feel that there needs to be something in the front right of the scene, but I'm not too concerned quite what at the moment. It could be an oil can, or some hosing, maybe a toolbox, spare part, whatever...

Layout figured out I got on with some priming and partial assembly of the mecha itself. The actual assembly was mostly guesswork, as there aren't any instructions, but there are a lot of parts! The resin of the cockpit/engine part didn't go together all that great either, but a bit of huffing and puffing and plenty of superglue and sanding got it in reasonable shape. :)

Colour scheme in mind is a very dark blue black over all, with orange markings to contrast. I'm kind of torn as to whether to weather the whole thing too much. I'm thinking not, but there is some damage on the resin that looks OK as damage, rather than spending endless hours making each piece super smooth, which I might have done with a less fiddly, and better fitting kit.

Armed with airbrush I laid in some basic grey to blue/black transitions, some basic metallics here and there, and then broke out the brushes to make the plating more blue (as the Tamiya colours that I own and I used in the airbrush aren't particularly strong blue). This is about as far as I got before being called away by the poorly toddler. There is some more work to do to the blue, then some edging and such before I add in the orange bits. The metals will need plenty of work, and there's loads of other bits to do, but it's working OK so far...


Oh, and the rim of the base will more than likely get either a sanding or some plasticard covering, as it is quite distracting at the moment. ;)


Tuesday, 21 January 2014

Until I return...

Brad is "complete". I hesitate to say "finished" because I know that I will need to tidy bits up here and there, and there is a good chance that I may add some neon glow to part of him when I put him and Yanet together on the base. But, for now, he has paint in most of the right places and I have put him in the cabinet next to Yanet (so that they don't stare at me accusingly for not giving them a nice base to play on!). It has been a bit of a disturbing trend for me of late, as I did the same thing for a Kingdom Death Watcher model which I couldn't make a decision on how to base recently. I actually think that I have a good idea for that now though, so I expect to put that together very shortly, and that could provide a nice model to take to Salute in which case...

Anyway, Brad. Non-metals done.I took two slightly different approaches as I wanted the "black" metal of the rifle to be slightly different to the metals elsewhere.


Also, a suggestion from Mr Painting Buddha (Michael Bartels) about the saturation of the green on his jacket led me to take another look, and I've now toned that back a bit using some very yellow skin tone (Vallejo Model Colour's Dark Flesh) mixed with the original green. I also added some reddish black to the original green and increased the shading here and there to the jacket. I can already see odd bits here and there that I'll most likely tweak or touch in when I go back to him (and Yanet, who I am going to fit out with a pistol rather than her current pole thing) with fresh eyes, but I am calling them both "done" for the moment, as neither of them offend my eyes too much as they are! ;)


I am now weighing up about half a dozen sci-fi type models as possible Salute entries, and I have 2 pinups on corks, primed and ready to go, so I should have new models to see very soon.

Thanks for dropping by! :)

Friday, 17 January 2014

More Bruddha-ly Love...

OK. I've moved Brad on a fair bit over the course of the week. The NMM still needs to be done, and bit of toning and tidying here and there, but the majority of the colours are in place now.


The bodysuit was bugging me because it was so plain and I wanted to get some sort of interest in there.

I could have painted some regular stripes in to break up the areas a bit, but I really wanted to do something a bit more asymmetric, so I did a bit of looking around and fell into Japanese influences again.

In the end I decided to put a Japanese style sunburst on the suit (I was tempted to go red with that, but thought it would be too lairy!). Anyway, I think that it is working much better now and I hope to push on through. I need to start thinking about possible models to take to Salute this year... ^_^

(apologies that the pics are a little meh)


Tuesday, 14 January 2014

He ain't heavy. He's my Bruddha...

Anyone who hasn't heard about the Painting Buddha yet, where have you been?!? lol.
Seriously though, if you are a painter who wants to improve what you do, and perhaps more importantly see another painter's method of approach to mini painting, then I strongly suggest you join in NOW! ^_^

I picked up the first set a couple of months back and was bowled over by the sheer quantity of great stuff that came with the starter set - 2 54mm resin models plus scenic base, 6 instructional DVDs featuring the work of 2 very talented and multi-award winning painters - Ben Komets and Rafael Garcia Marin. - plus a metal tin that the models came in, badges, assembly instructions and a lovely t-shirt, all in a presentation case.
All for not an awful lot at all... I have also thrown my hat in for the 1.3 edition coming soon all about basing, because I fell that I need to be a little more expansive with my basing.


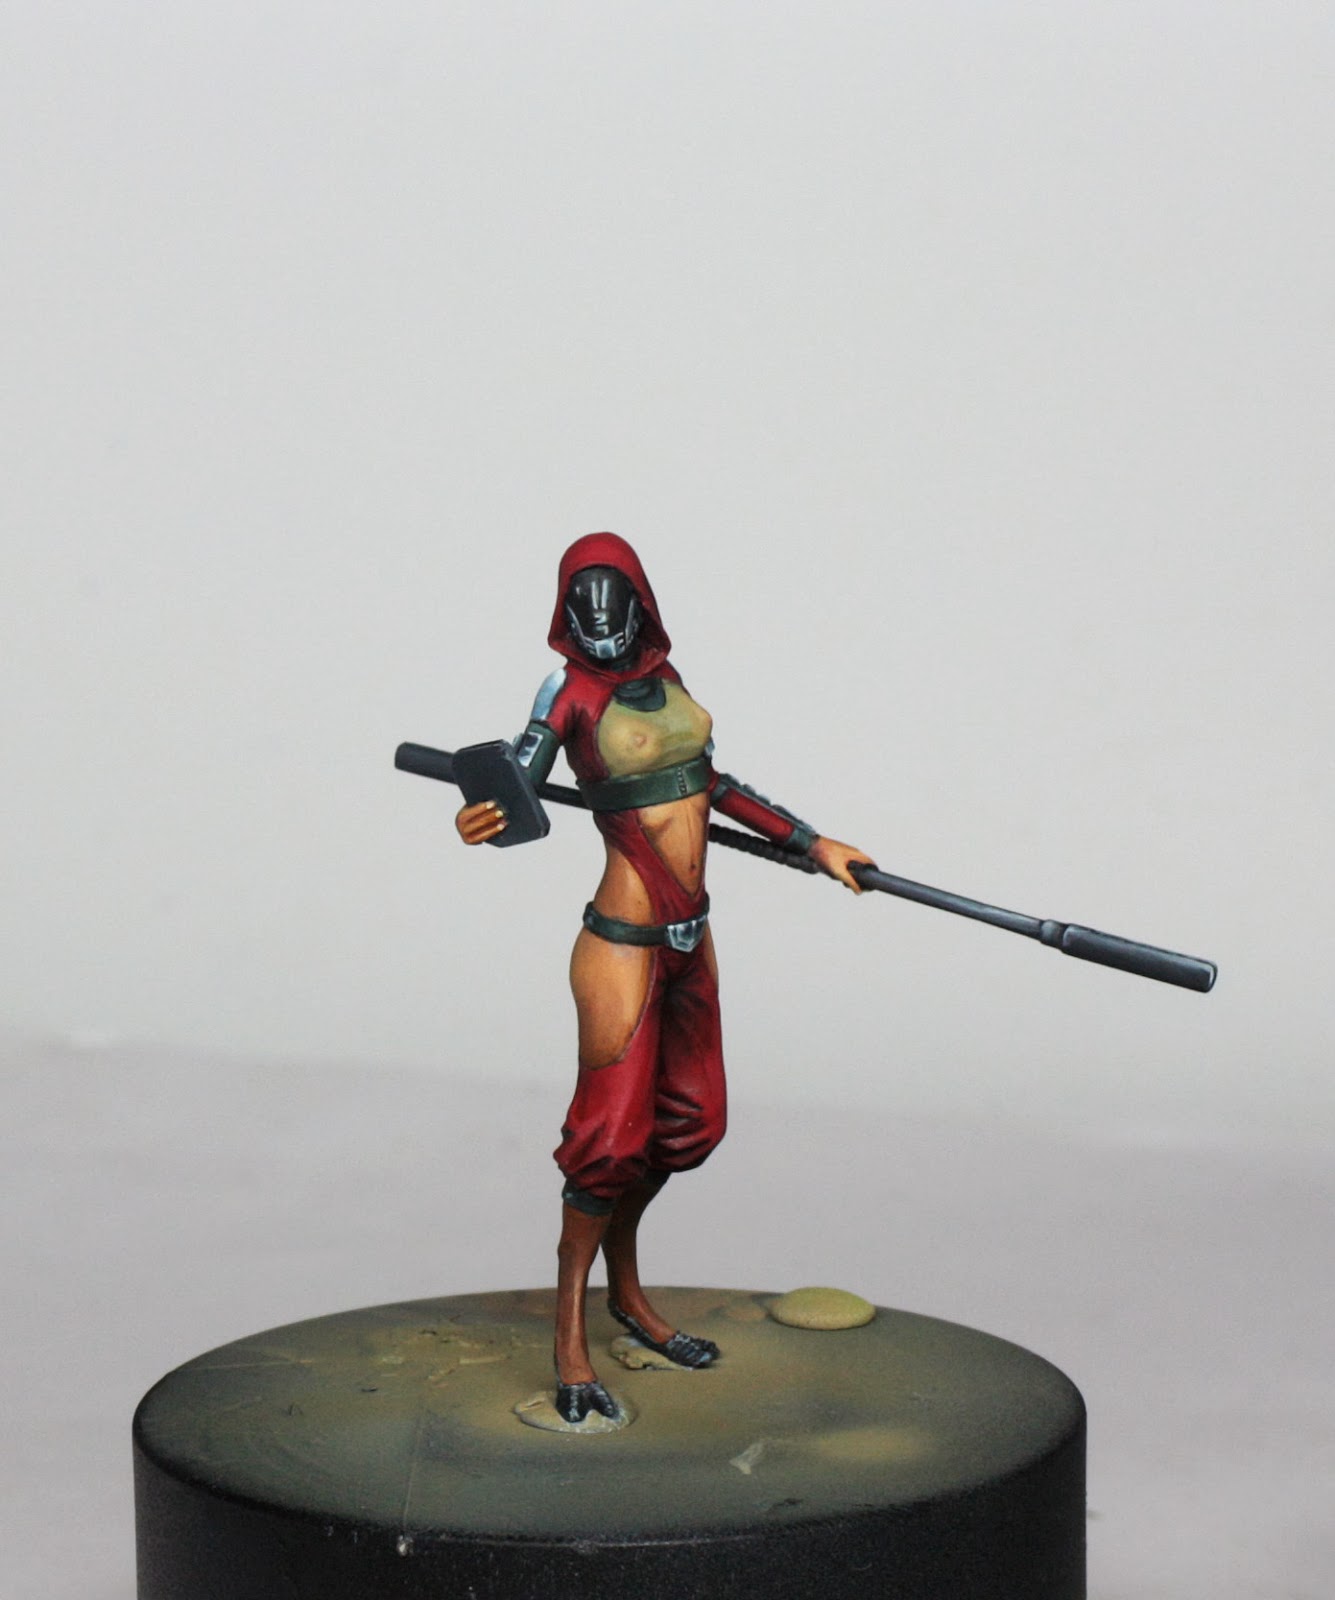
Anyway, having watched some of the DVDs I decided to dive in with Yanet and Brad from the set. I wanted to go for a very different scheme to those in the videos, most specifically I wanted to get a bit more skin on show with Yanet. This was one of the first models that I used my airbrush on a few weeks back, and it was a bit of a lesson in the dos and don'ts of masking. Fortunately nothing serious went wrong, although I did find the resin of these models to be rather brittle, so I've had a few breakages; so much so that Brad was supposed to have a really long sniper rifle with scope. Now though, he has a nice compact carbine, which you'll see soon! hehe. Similarly I think that Yanet's pole might get swapped for the sci-fi styled side arm pistol that came with her, because it is bent, and no amount of straightening seems to last with it, unfortunately...


I've not painted that much in red lately, which is an odd statement, but I used to paint a lot of red, especially back in my space marine painting days. In this case I made Yanet's robe red, with a quite swarthy skin tone. This was offset with straps and belts made to look like rubber, a sort of greenish see-through latex top, and some dark NMM to finish.


Brad I wanted to sort of complement Yanet in a contrasting colour, so I've gone green so far. However, I plan on getting some red in before I finish him. I don't know how I ended up giving him a moustache and soul patch though! One minute I was doing my usual mucking around with skin tones, the next he's sporting a fetching bit of facial hair! O_o

The body glove was some Vallejo Panzer Aces Tank crew colours. The jacket is mostly Vallejo Uniform Green and Russian Green, so far.

Hopefully will get some more progress in before the end of the week.

Cheers! ^_^

Friday, 10 January 2014

Here goes nothing...

Well. From tiny acorns and all that...
I've been feeling the need to create a blog for a while now. I don't really know why specifically, as I've been an active forum member over the years. I think that the main thing is that I've reached a stage in life where I forget lots, and if I don't get it written down or typed out then it tends to just not happen or I forget how I may have done something. So, I guess that this corner of the blogosphere will help me in that regard.
What I plan to do here is share my musings on mini painting and occasionally show a model from start to finish.
My bio page has more on my background and that, so let me first say thanks for stopping by, and I'll get on with what I am doing now...

First of all, most who know me and what I like to paint will know that I have a particular affiliation for Kingdom Death. A lot of this has to do with the fact that I received a huge box of toys from Adam Poots by way of a prize for winning a competition on Wamp with my take on the Twilight Knight Pinup, but I mentioned in my fave companies area that I have been a fan since day one too. When I received my prize shortly after the successful Kickstarter campaign for Kingdom Death:Monster, the wife told me that I clearly had "enough" models now. It was a hard position to argue that there is no such thing as "enough", but the sheer quantity of models which had never seen the light of day at that point in the box meant that I had a pretty rich vein to mine for a while, and my spending on models has been drastically reduced. I do still buy the odd very limited piece when they become available and occasionally swap the odd model here and there with fellow enthusiasts.

 So, this leads me to a model that I have just completed, which is (unsurprisingly) a Kingdom Death sculpt called the Architect Pinup. This 37mm tall sculpt was based on an art piece by Lokman Lam that wasn't originally commissioned for KD, but Adam liked it enough to ask for the permission to sculpt it. The sculpt was created by KD's main go to guy for digital sculpting, Jon-Troy Nickel, aka Hazardous Arts, who is responsible for many of Kingdom Death's sculpts, especially the Pinups, including the aforementioned Twilight Knight pinup, so expect more of his work to be seen here, or already sat in my galleries on CMON and/or P&P.

The Architect Pinup was sculpted in two optional configurations - the first is as per the concept art with a cape and face mask/helmet, the second has neither cape nor head - and on this occasion I decided to have a go at the second version. I also wanted the model to look unlike the dark look of the majority of the KD range, and I felt that she had quite an Anime feel about her.
So I set about giving her quite a bold red/white/blue colour scheme. The blue is really a pale teal, but I felt that would complement the stronger red quite nicely.
I didn't want to make a big feature of the curved bladed weapon in her hand, so I deliberately muted the colours there (which seems to be a common thing with a lot of the anime pictures that I looked at when planning this scheme.


 I am currently getting to grips with my first airbrush too, an Iwata Neo, so I used that to lay down the skin tones at the beginning, then once I had tidied up the blends with glazes, the rest was all brushwork. I resisted the idea of an airbrush for a long time, thinking perhaps that it was somehow cheating, or encouraging me to not improve my skills and use the airbrush as some kind of crutch. However, I have quickly realised that it is a great tool that allows me to get a lot of the donkey work out of the way and concentrate on the details with my regular brush. I definitely have a LONG way to go until I master it though because it is another new skillset entirely to using a conventional brush - and learn not to break bits which look tiny and turn out to be rather expensive to replace! - but it is something which has already helped to speed up my painting and allows me to approach more than one model at once without losing enthusiasm, which I always struggled with in the past. I also hope to use it to be able to work on larger scale models in the future, and have already made my first little forays into this with a previous couple of models, which I'll put up in some future posts. :)

I'll get her posted up in the CMON and P&P galleries shortly, and pop links up accordingly.

Cheers!